Introduction#
I run an APC Smart‑UPS 1500 with an AP9630 Network Management Card (NMC) in my homelab. A Raspberry Pi handles Network UPS Tools (NUT), which lets me gracefully shut down power‑sensitive systems like my NAS.
USB monitoring with NUT worked fine, but SNMP was a different story. The NMC was exposing newer OIDs that the packaged version of NUT simply didn’t understand. The fix was to build a newer version of NUT from source - and that’s what this guide walks through.
Why SNMP?#
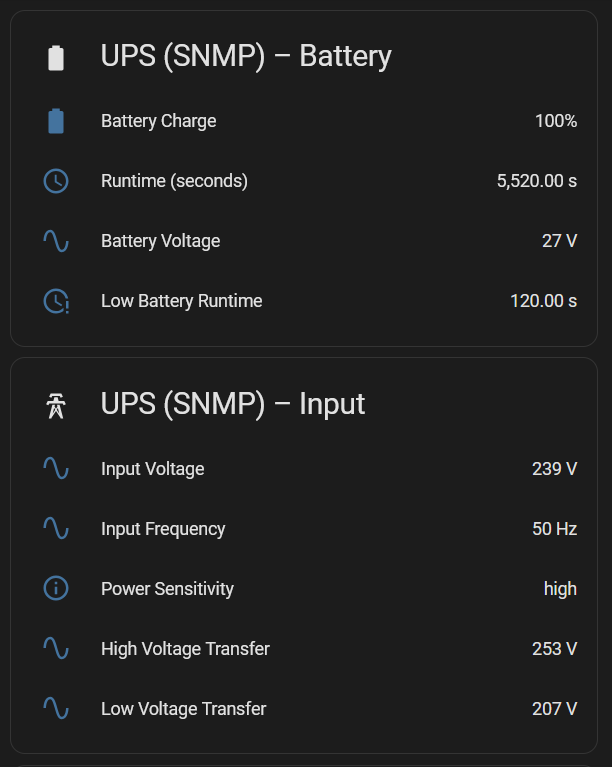
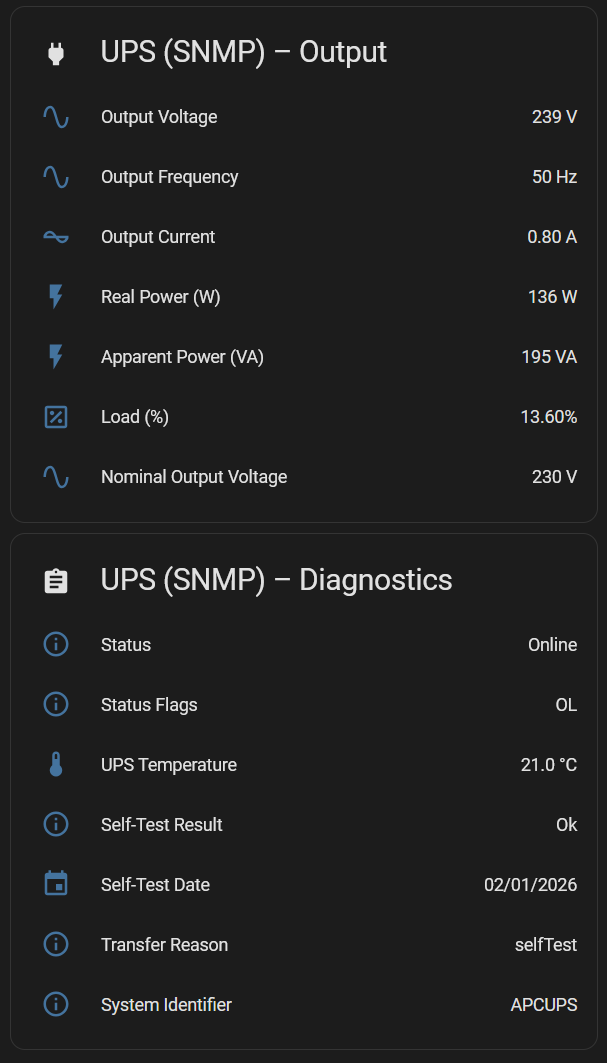
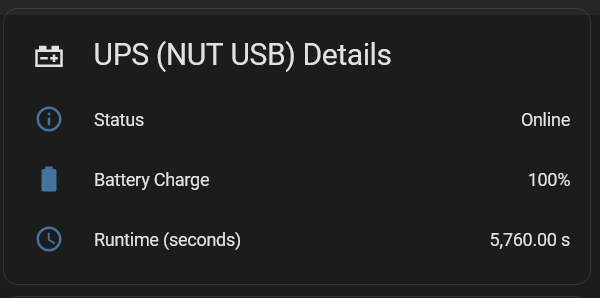
USB monitoring works well enough for basic shutdown automation. But once I started integrating Home Assistant dashboards and automations, the USB HID driver felt extremely limited. SNMP exposes far richer telemetry: load, battery capacity, runtime estimates, temperature, alarms, and more.
The problem: outdated NUT packages#
A simple:
sudo apt-get update && sudo apt-get upgrade…won’t help. Debian‑based distros typically ship NUT 2.7.x, while upstream is already at 2.8+. The SNMP driver improvements you need are only in the newer releases.
You can grab the latest tarball from:
https://networkupstools.org/download.html
Configuring SNMPv3 on the APC AP9630#
On the AP9630 NMC, enable and configure SNMPv3:
Configuration → Network → SNMPv3 → Access
Enable SNMPv3.
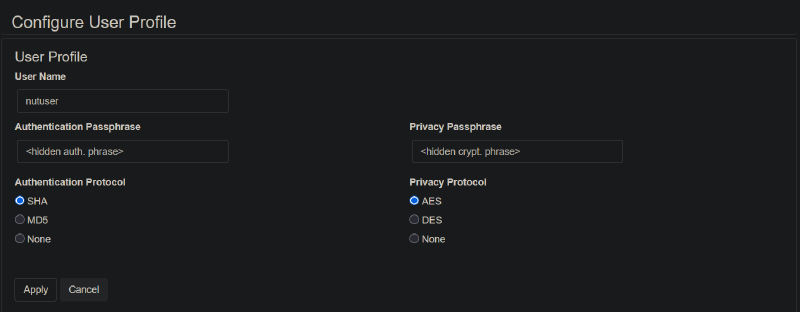
Configuration → Network → SNMPv3 → User Profiles
Create a user with:
- Security Level:
authPriv - Authentication Protocol:
SHA - Privacy Protocol:
AES - Authentication Passphrase: your choice
- Privacy Passphrase: your choice
Test your SNMPv3 credentials with:
snmpwalk -v3 -u "nutuser" -l authPriv \
  -a SHA -A "<Auth Passphrase>" \
  -x AES -X "<Priv Passphrase>" \
  <NMC IP> 1.3.6.1.2.1.3
Installing a newer version of NUT#
1. Back up your existing configuration#
sudo cp -a /etc/nut ~/nut-backup-$(date +%Y%m%d-%H%M)/2. Remove the distro‑packaged NUT#
sudo apt remove nut nut-server nut-clientA reboot here avoids leftover processes interfering.
3. Download and extract the latest NUT release#
wget https://www.networkupstools.org/source/2.8/nut-2.8.4.tar.gz
tar xzf nut-2.8.4.tar.gz
cd nut-2.8.4
4. Configure the build#
Install packages required to build
sudo apt install build-essential libusb-1.0-0-dev libsnmp-dev libssl-dev libtool automake autoconf pkg-config libgd-devReplace nut with the user/group you want NUT to run under.
./configure \
  --with-usb \
  --with-snmp \
  --with-systemd \
  --with-serial \
  --with-openssl \
  --prefix=/usr \
  --sysconfdir=/etc/nut \
  --with-user=nut \
  --with-group=nut
5. Build and install#
make
sudo make install
sudo make install-as-root
6. Restore or recreate your configuration#
Copy your backed‑up files or create fresh ones (examples below).
7. Restart NUT#
sudo systemctl restart nut8. Verify the driver is running#
systemctl status nut-driver@ups.service(Substitute ups with your driver name.)
Fixing USB HID permission issues (if using USB + SNMP)#
If the USB driver fails to claim the device:
1. Check for udev rules#
ls -l /etc/udev/rules.d/ | grep nut2. Identify your UPS#
lsusbExample:
Bus 001 Device 003: ID 051d:0003 American Power Conversion UPS3. Check permissions#
ls -l /dev/bus/usb/001/003You should see group ownership matching your NUT user.
4. If needed, copy the default rules#
sudo cp /lib/udev/rules.d/62-nut-usbups.rules /etc/udev/rules.d/
sudo udevadm control --reload-rules
sudo udevadm triggerCheck running drivers:
ps aux | grep -E "snmp-ups|usbhid-ups"If something still isn’t working, inspect logs:
sudo journalctl -u nut-driver@apc_snmp.service -n 50
sudo journalctl -u nut-driver@ups.service -n 50
My NUT Configuration#
I run both USB and SNMP drivers.
/etc/nut/nut.conf#
MODE=netserver/etc/nut/ups.conf#
maxretry = 3

[apc_snmp]
  driver = snmp-ups
  port = <NMC HOSTNAME/IP>
  desc = "APC Smart-UPS via SNMPv3"
  snmp_version = v3
  secLevel = authPriv
  secName = nutuser
  authProtocol = SHA
  authPassword = <Authentication Passphrase>
  privProtocol = AES
  privPassword = <Privacy Passphrase>

[ups]
  driver = usbhid-ups
  desc = "APC 1500"
  port = auto
  vendorid = 051D
productid = 0003The section names ([apc_snmp], [ups]) are what you pass to upsc:
upsc apc_snmp@localhost/etc/nut/upsd.users#
[upsmon]
  password = <PASSWORD>
  upsmon primary
  actions = SET
  instcmds = ALL

[observer]
  password = <PASSWORD>
  upsmon secondary
Final checks#
Reboot your NUT host and confirm:
- SNMP driver starts cleanly
- USB driver (if used) claims the device
upsc <name>@localhostreturns data- Home Assistant or other consumers can poll NUT
Once everything is stable, you’ll have a far richer UPS monitoring setup than USB alone can offer.